

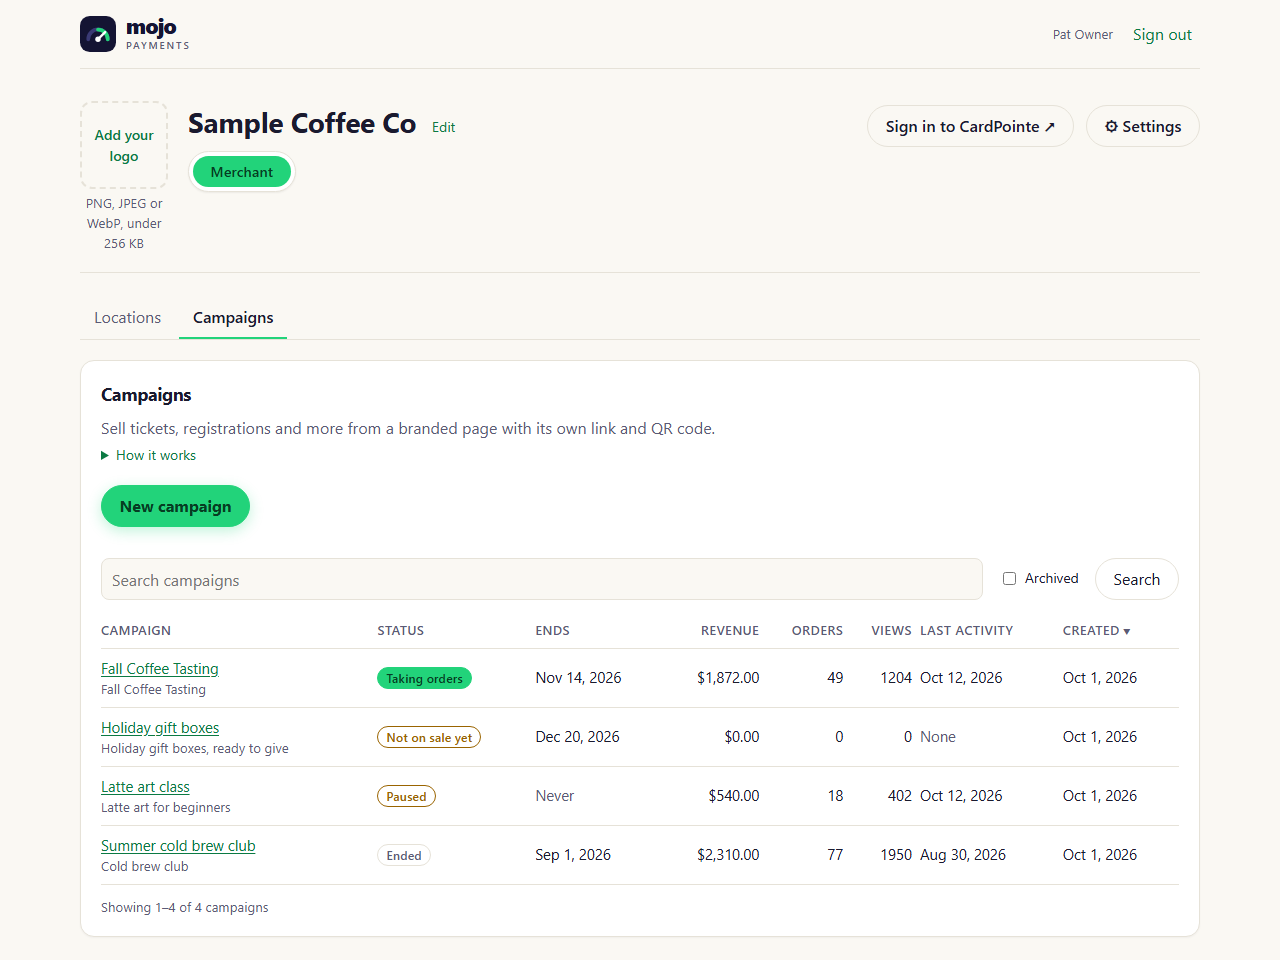
Campaigns: your campaign pages (portal as of October 2026)
Create a campaign
1
Start one
On the Campaigns tab, click New campaign. It starts as a draft: nobody can order until you put it live.
2
Name it and write the page
A name for you, the headline customers see, and a message (a blank line starts a new paragraph). If you have more
than one MID, choose the one the payments go to.
3
Design it
A banner picture, an accent color (over your payment page’s color), and whether items show as a list or a grid of
cards. The page uses your logo, font and contact details from Settings → Payment page. The preview beside the
form shows the page as customers will see it, as you type.
4
Add what you're selling
Items and bundles: see below.
5
Set the dates
When sales open (optional) and when the campaign ends, or leave the end empty and it never ends.
6
Choose what to ask at checkout
Every customer gives their name and email (their confirmation goes there). You can also ask for a phone number
(optional or required) and one question of your own, such as “Names of everyone attending”.
7
Save, then go live
Save it, check it, and click Go live. The link starts taking orders.
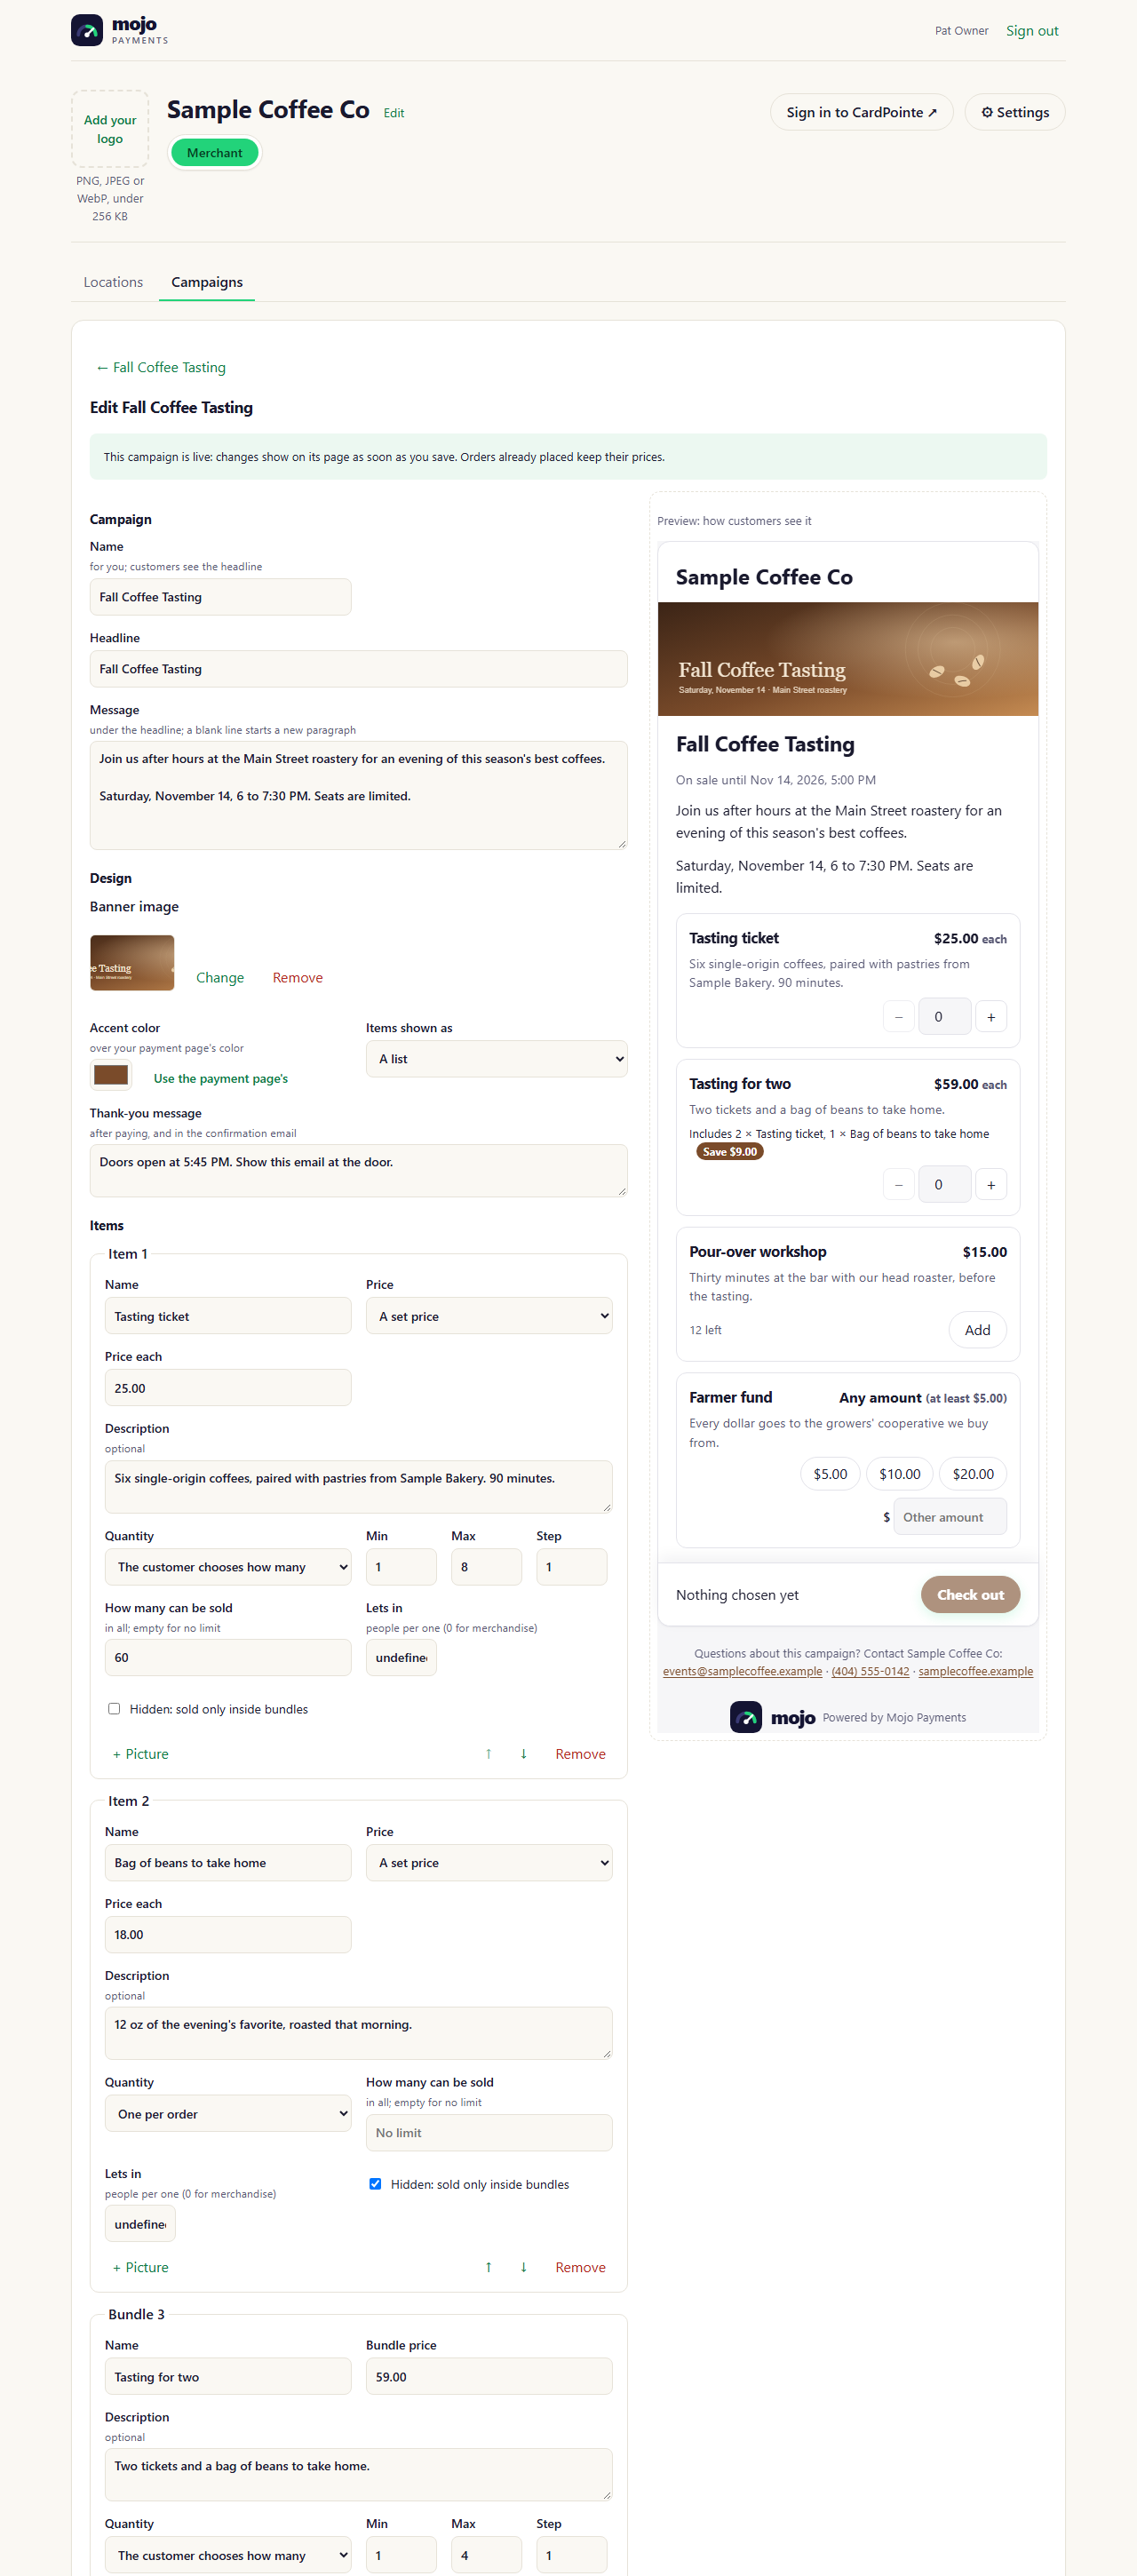
Campaigns → a campaign → Edit campaign, with the live preview (portal as of October 2026)
Items and bundles
Each campaign has its own items. Nothing is shared between campaigns, so changing one never changes another.- Hidden items are sold only inside bundles, never on their own. For example, a bag of beans that only comes in the “Tasting for two” pack.
- How many can be sold: leave it empty for no limit, or set a number (200 seats). Items sold inside bundles count toward it, so a bundle of two tickets and the tickets themselves share the same seats. When an item runs out, the page says Sold out. Tick Show how many are left to show customers the count.
- Reorder items with the arrows; the page shows them in that order.
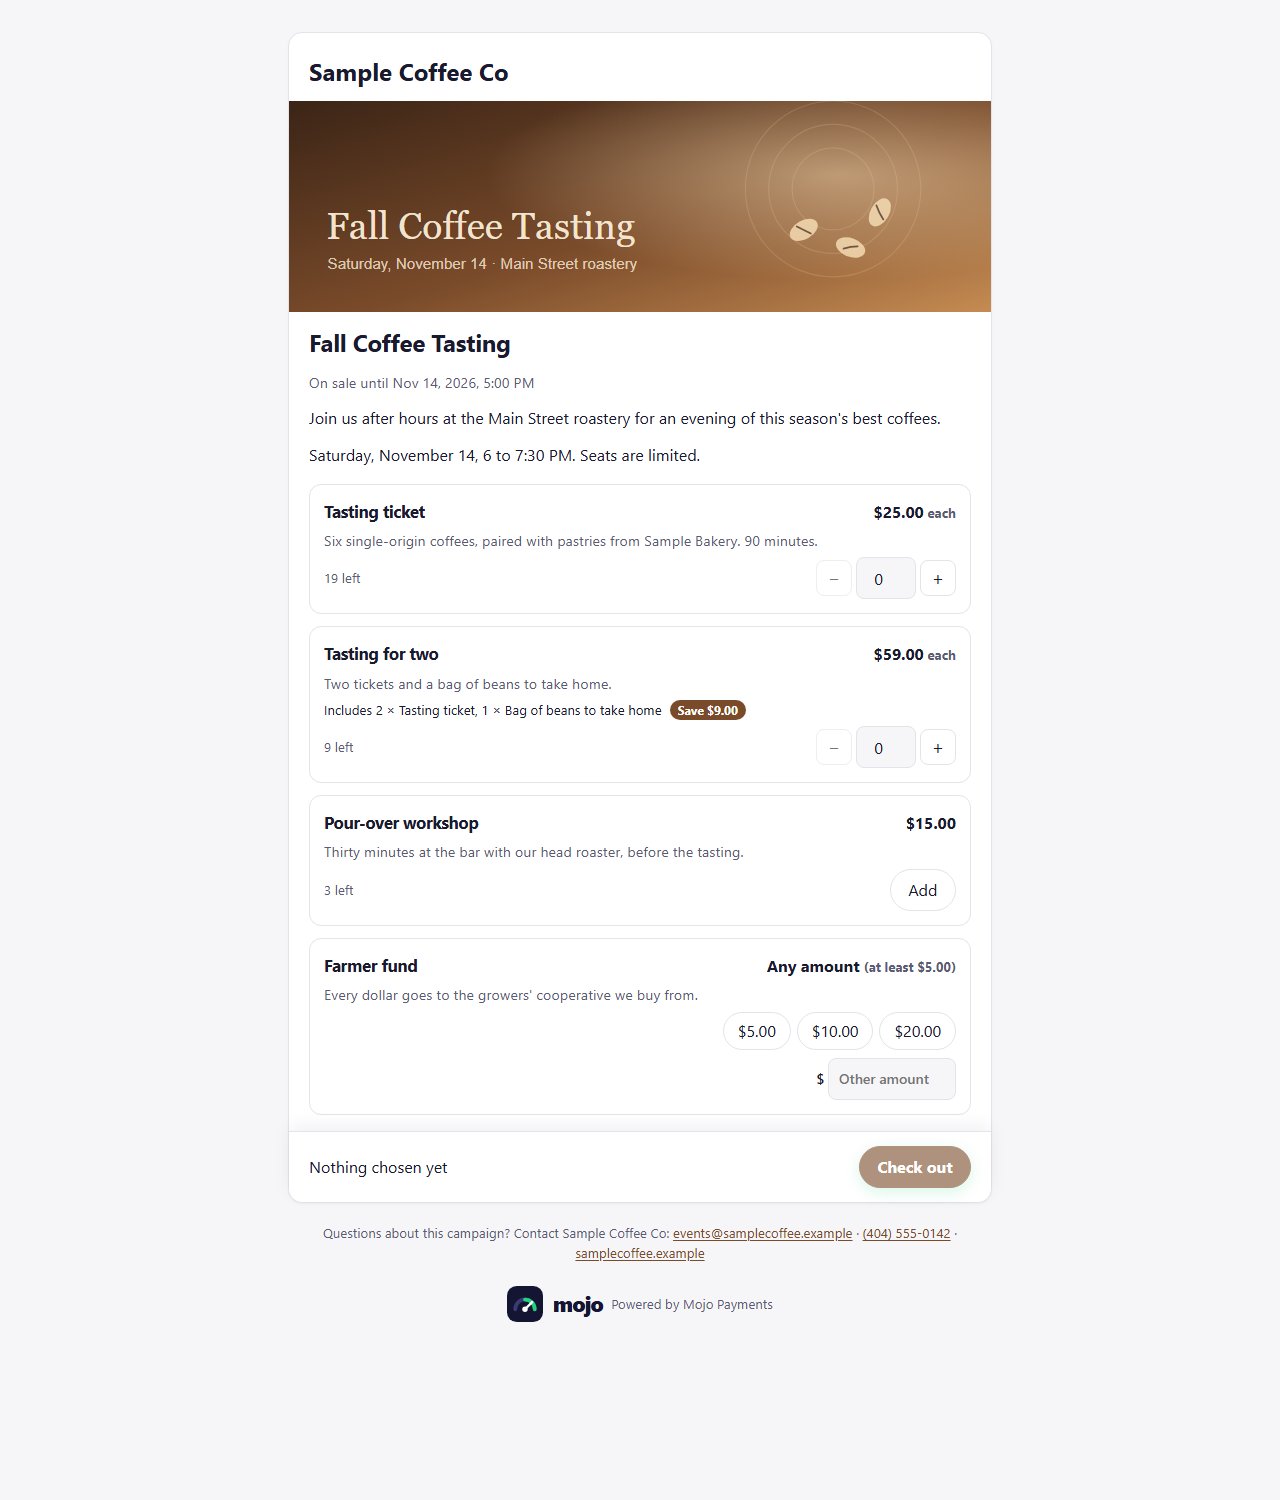
The customer's page (as of October 2026)
Share it
Every campaign shows its link at the top, with Copy link and a small QR code. Its Link and QR code button opens the full QR code and the link (copy it, or open the page). Download the QR code as a PNG for screens and social media, or as an SVG for print: it stays sharp at any size. Put it on posters, flyers, table tents and receipts; a phone camera opens the page. If your payments use your own web address (Settings → Payment page), the link uses it too.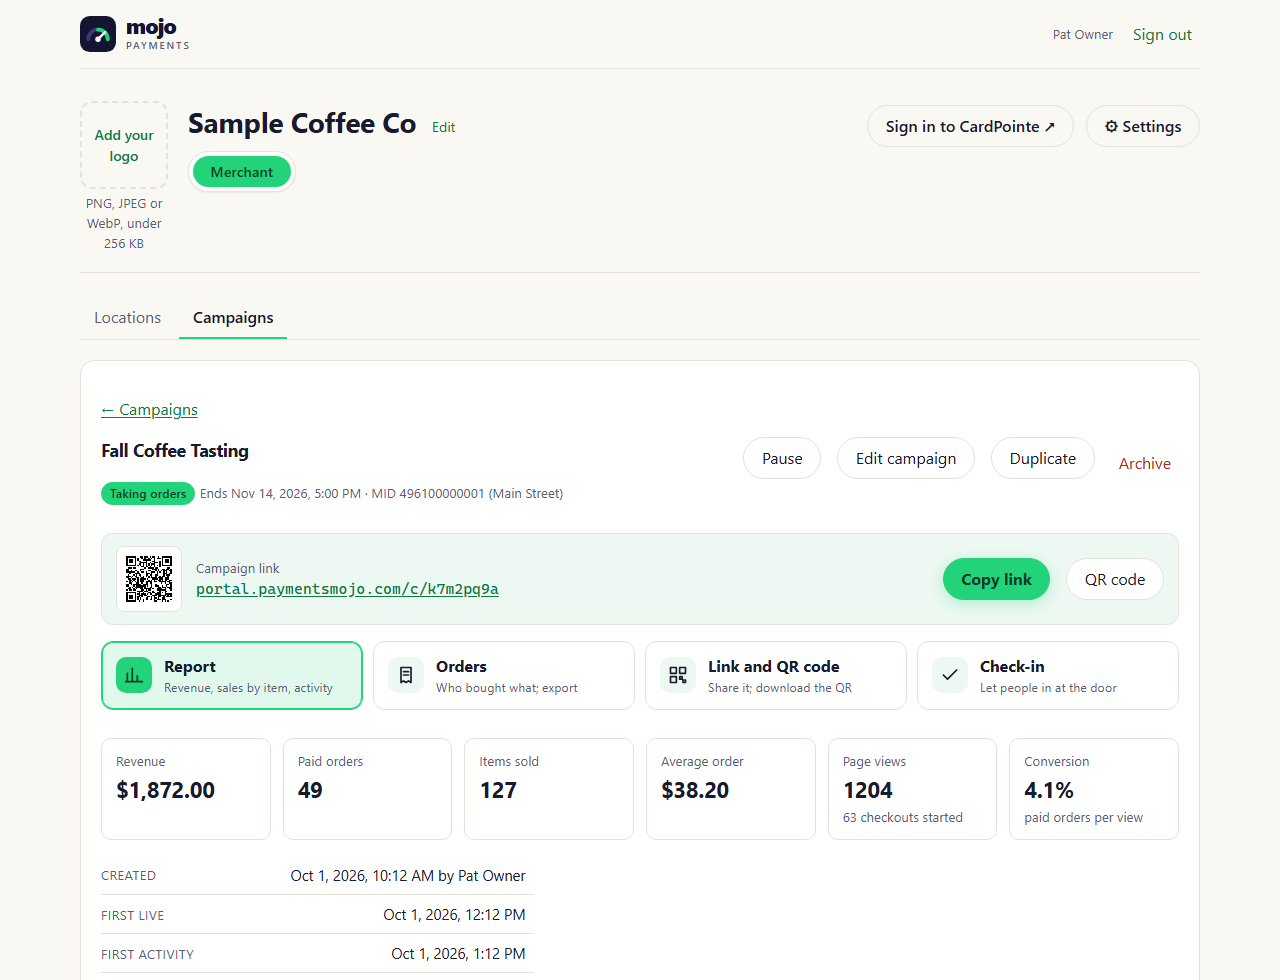
A campaign → Link and QR code (portal as of October 2026)
How customers order
- They open the link or scan the code, choose items, and see the total as they go.
- Check out: they give their name, email and anything else you asked, then continue to payment.
- They pay on your payment page, the same one your invoices use, with their card entered in the card processor’s secure form. Their items are held for 30 minutes while they pay; after that, the order can’t be paid and the items go back on sale.
- They get a confirmation email with their order, your thank-you message, and your contact details. If you set an address under Email each order to, a copy goes there too.
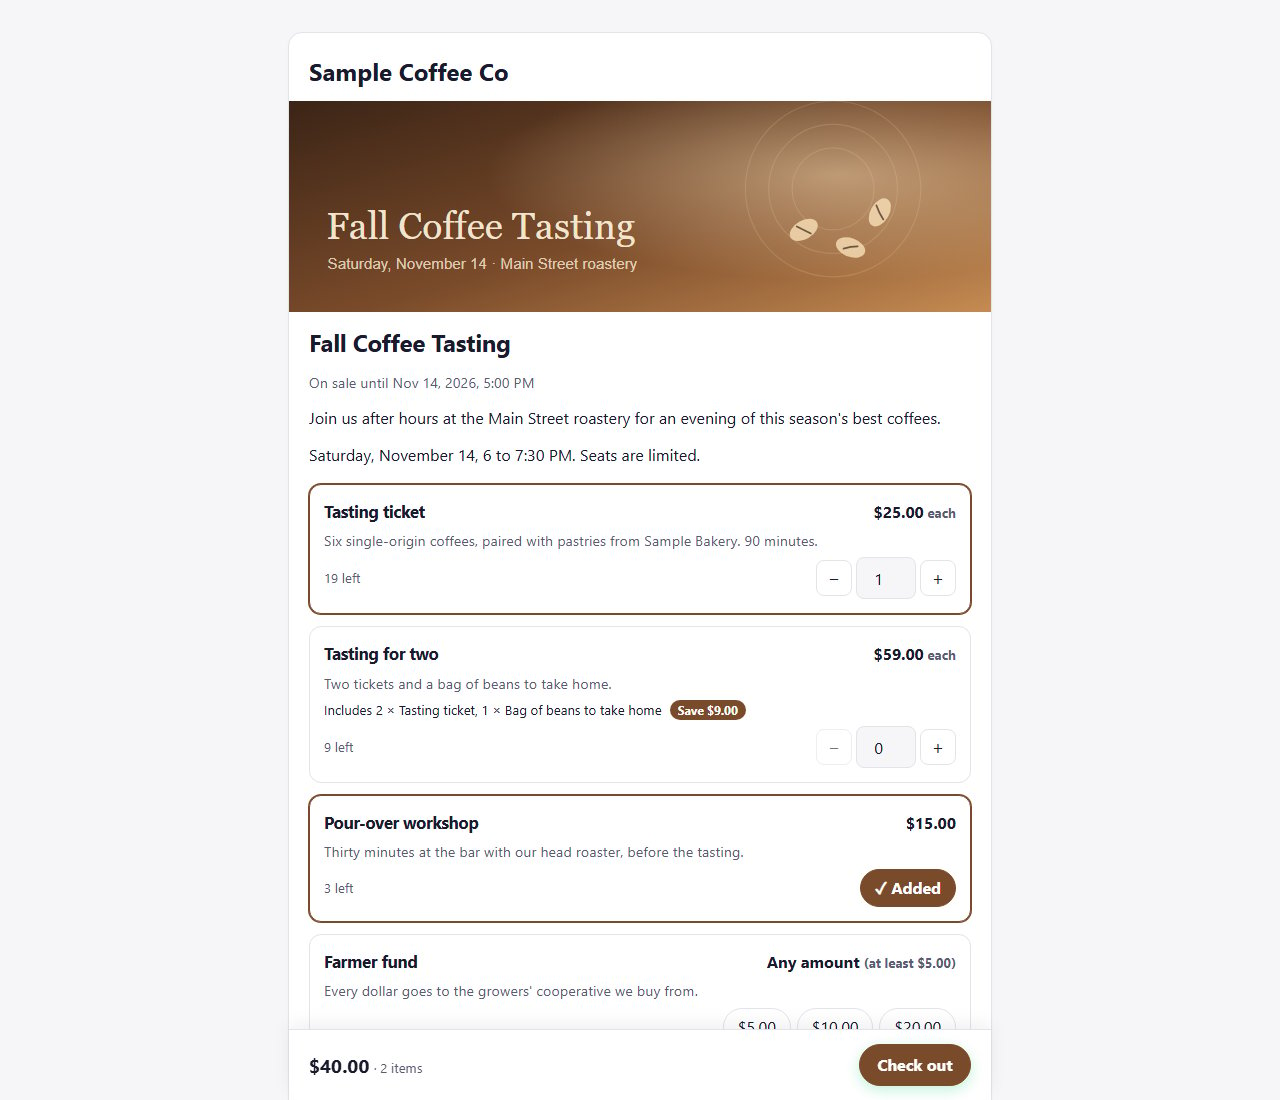
Choosing items: the total updates as they go (as of October 2026)
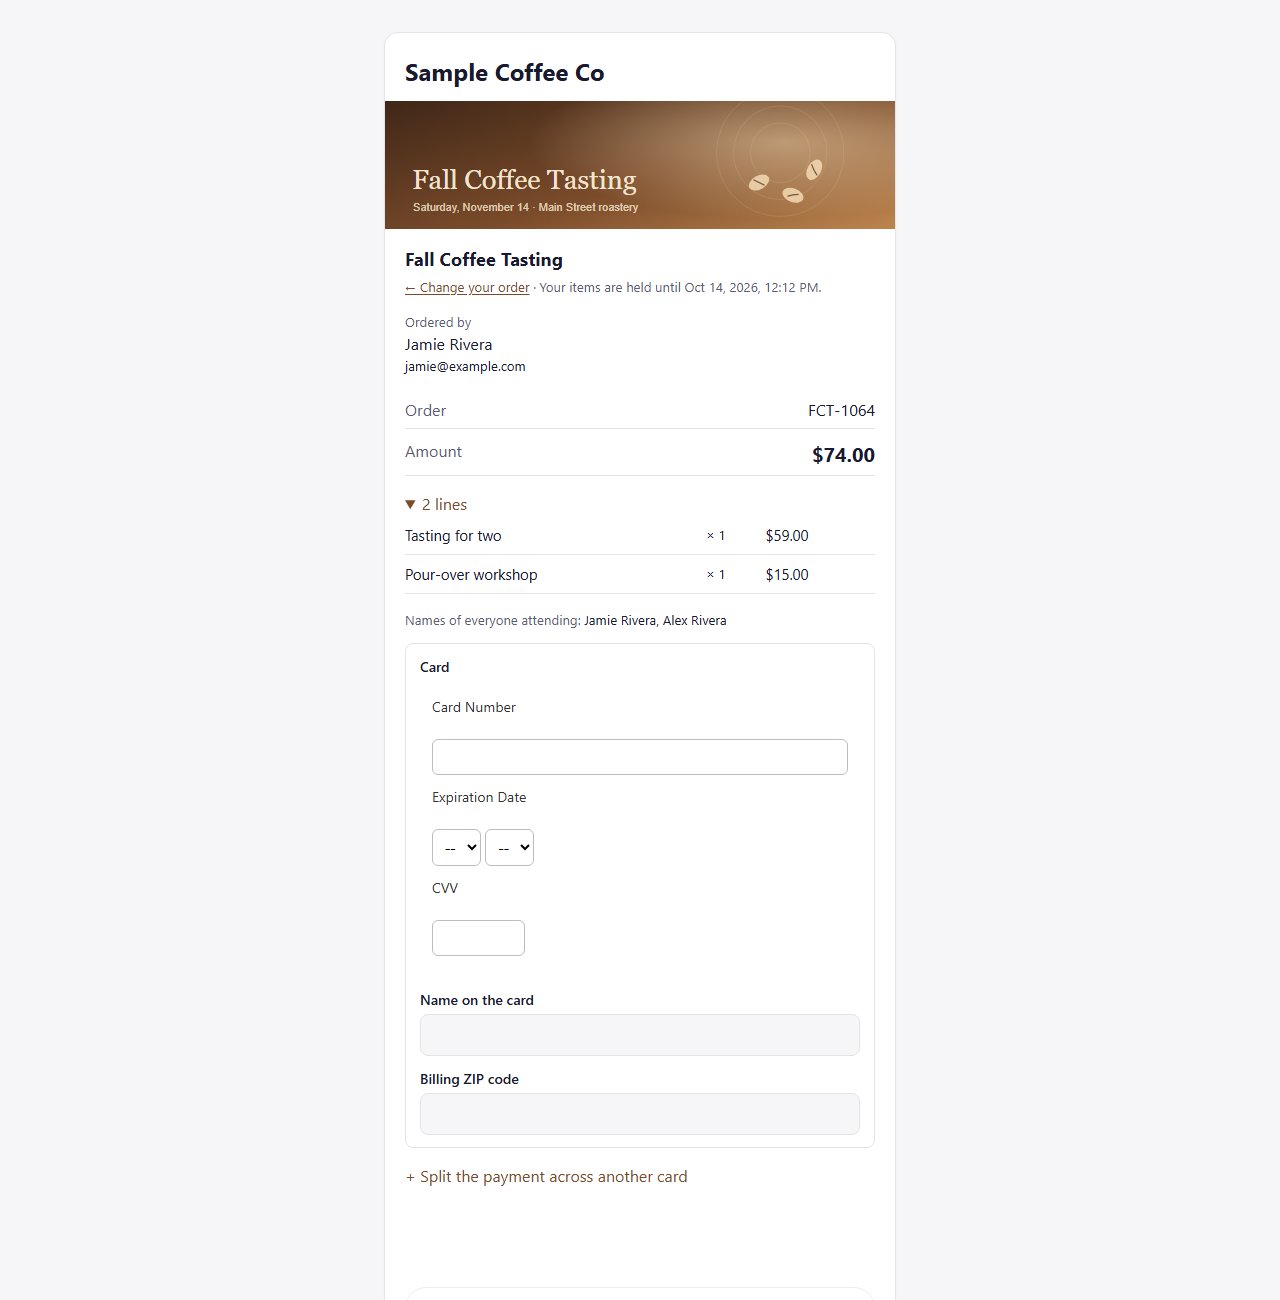
Paying for the order (as of October 2026)
Reports and orders
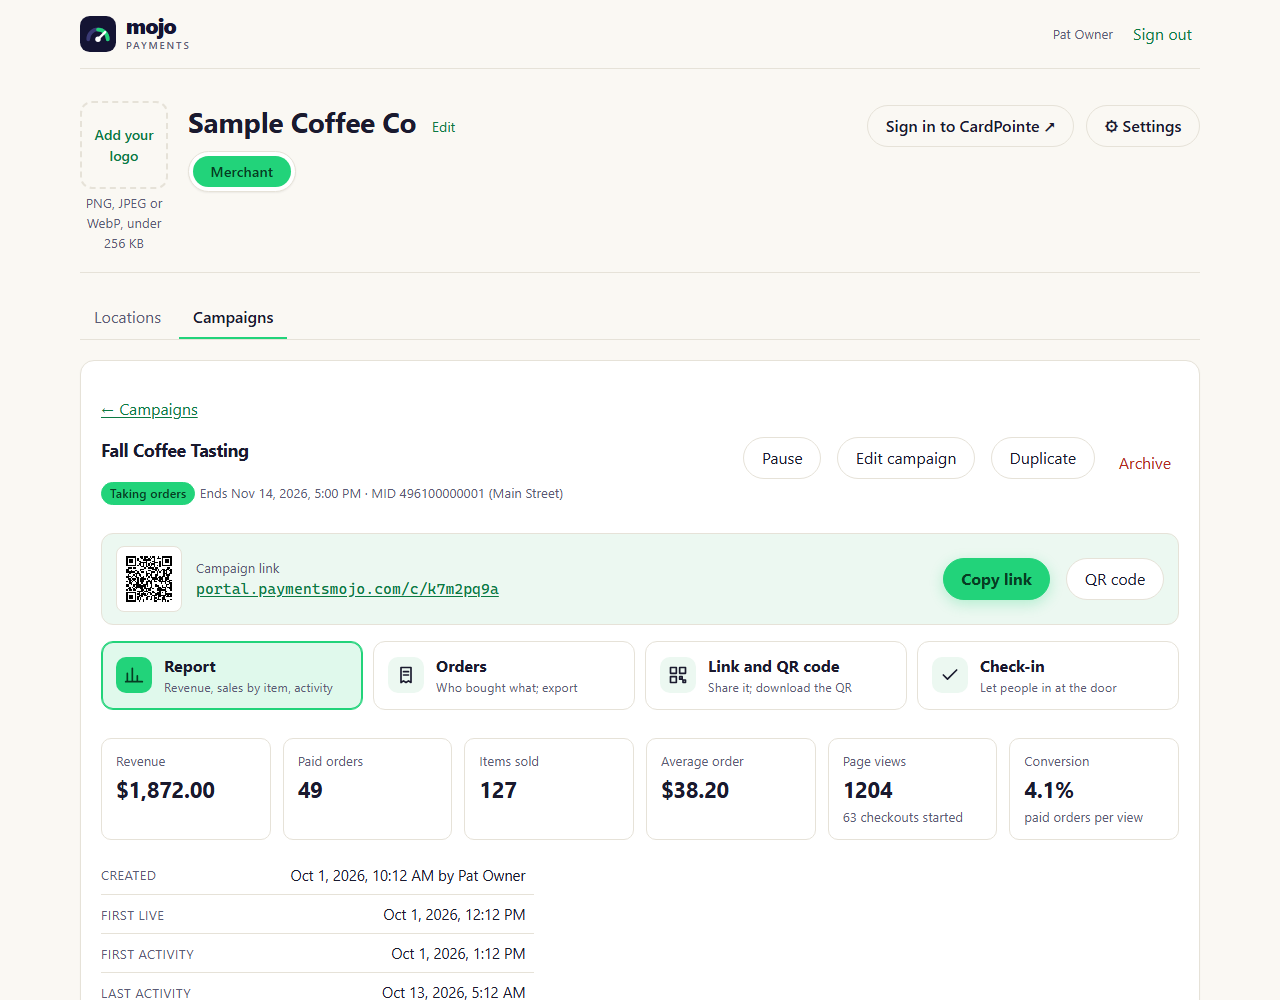
A campaign’s Report shows:- Revenue, paid orders, items sold (counting items inside bundles), average order, page views and conversion (paid orders per page view).
- When it was created, first went live, its first activity (the first checkout) and last activity (the latest checkout or payment).
- Revenue and page views day by day.
- By item: how many sold on their own and inside bundles, in how many orders, the revenue, and how many are left.
- Checked in: with check-in on, how many people paid orders let in, and how many are in.
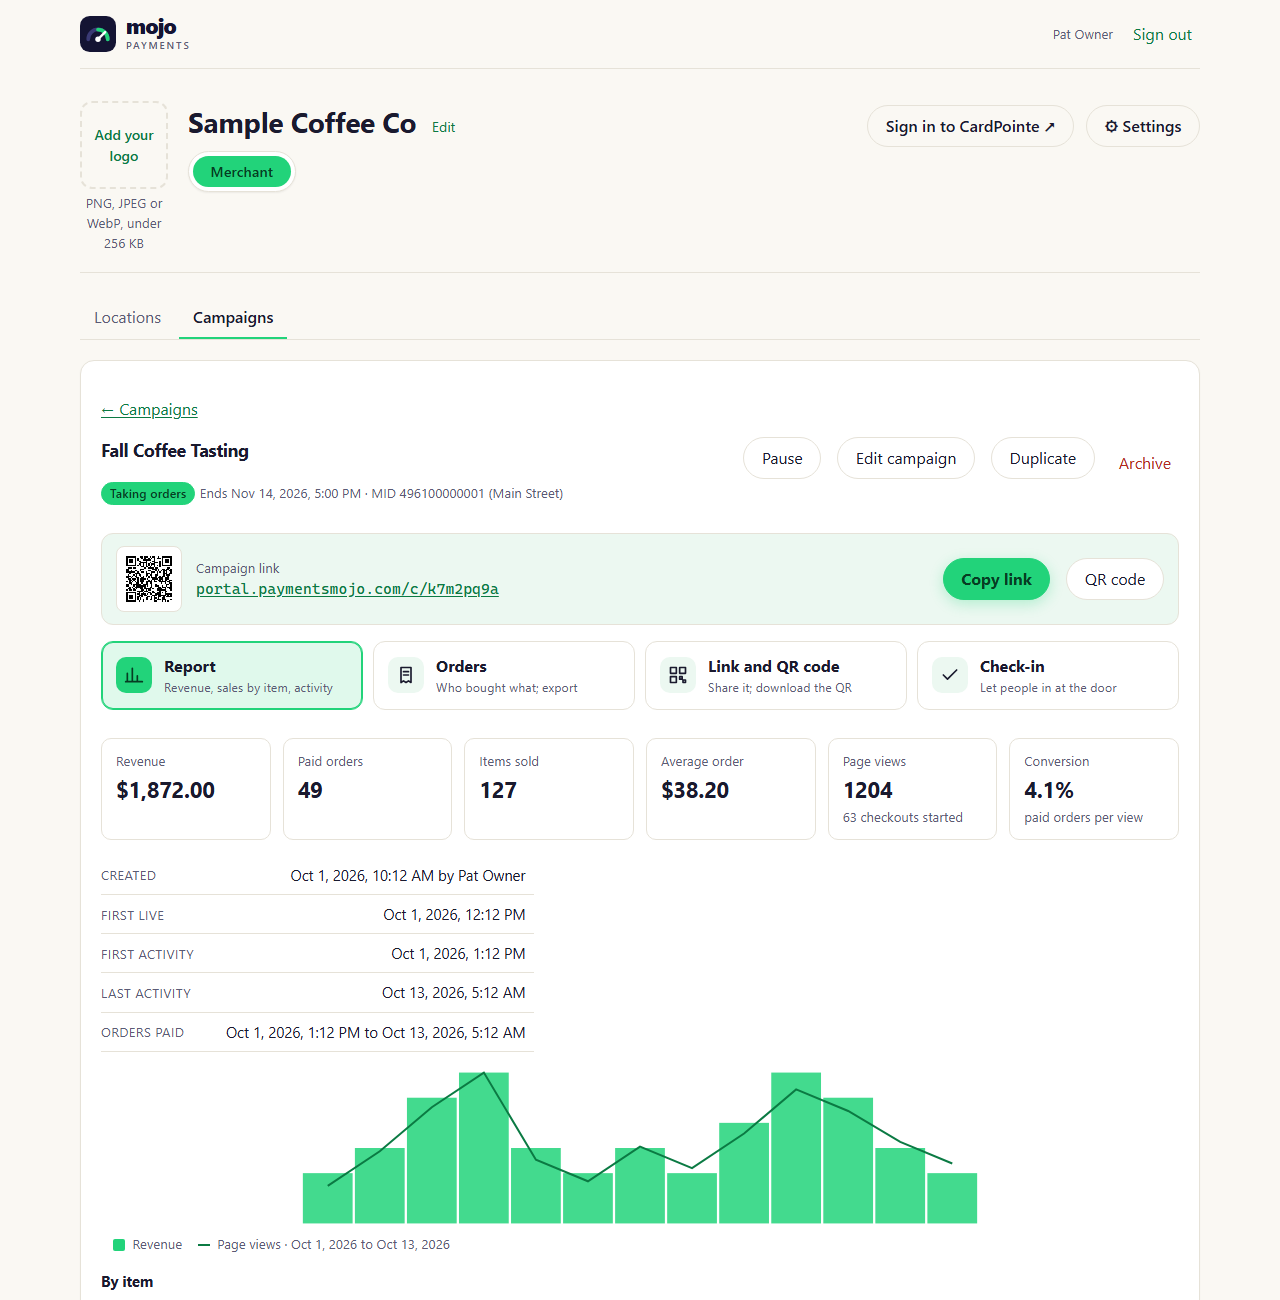
A campaign → Report (portal as of October 2026)
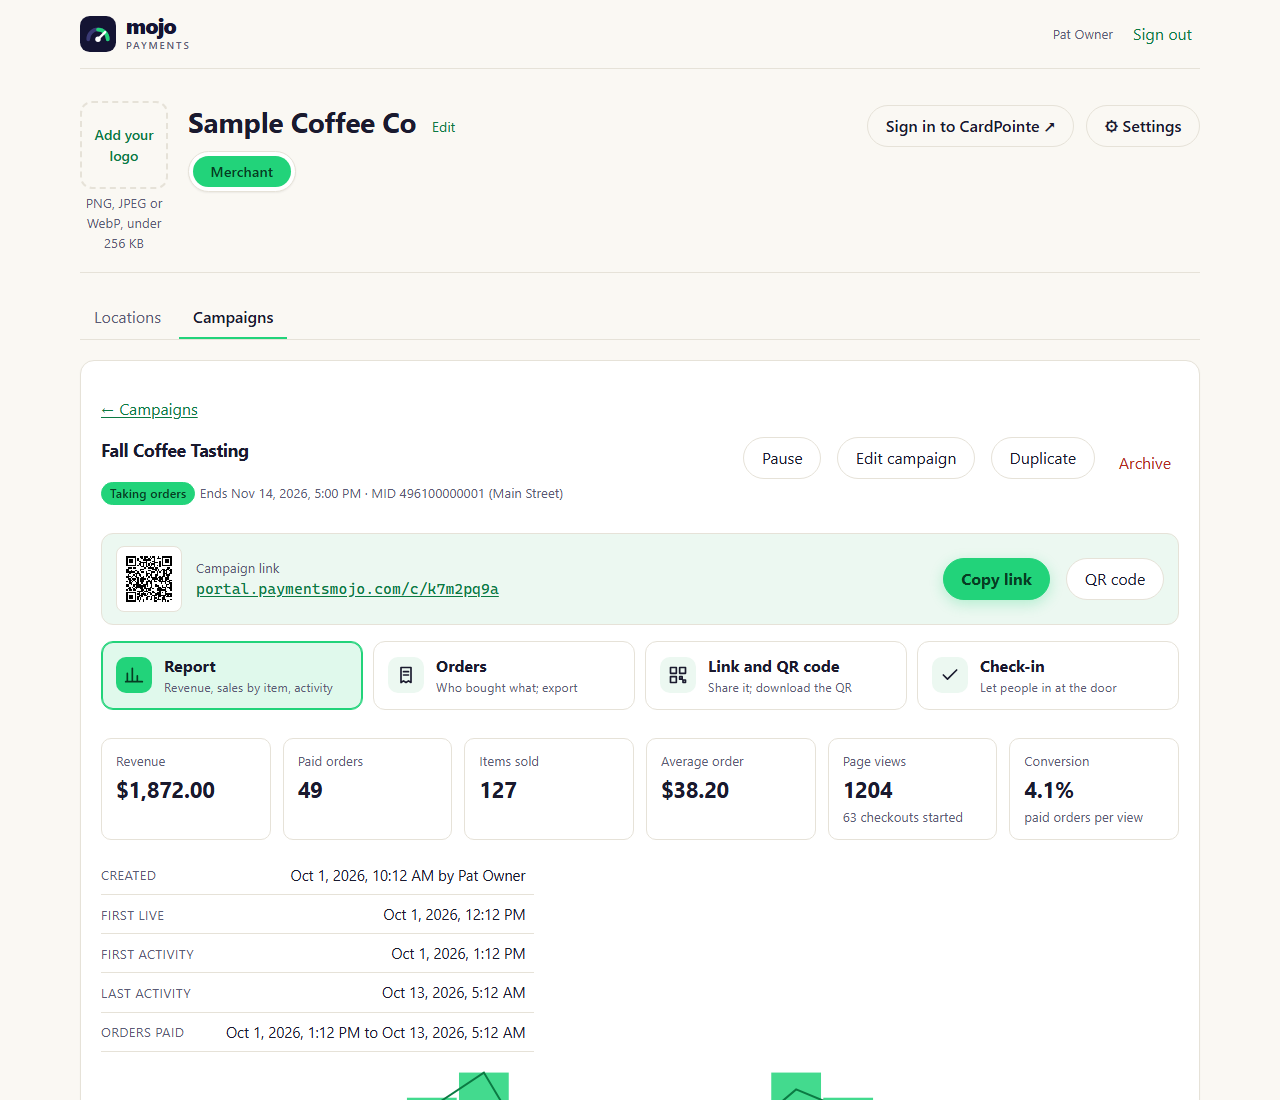
A campaign → Orders (portal as of October 2026)
Check people in at the door
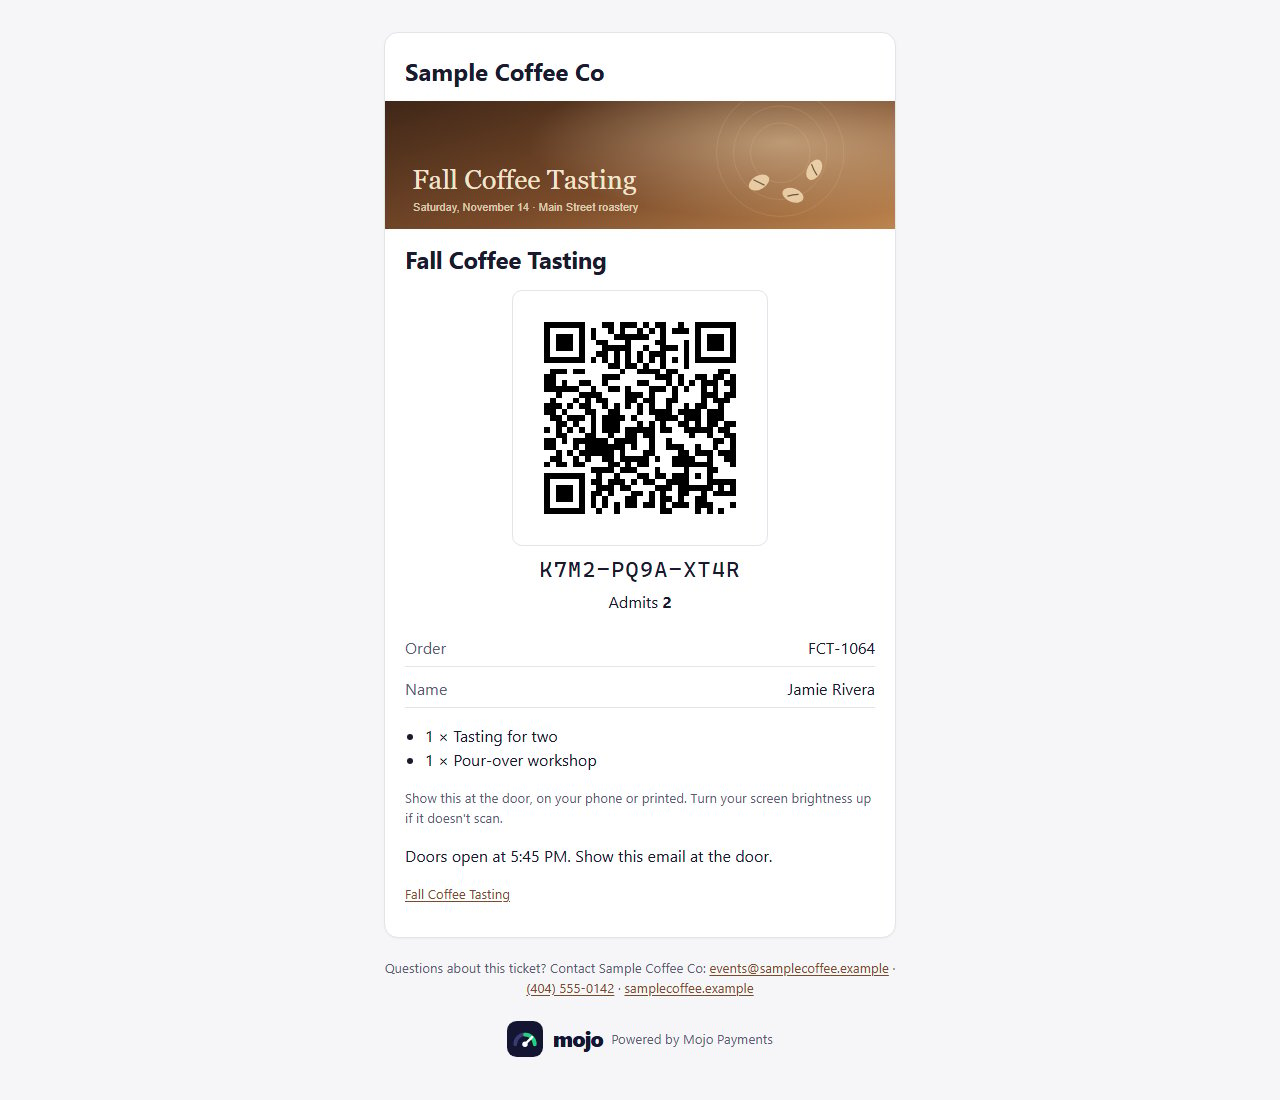
Turn on Check people in at the door when you edit a campaign (under Checkout). Then each item says how many people it lets in: a ticket 1, a table for eight 8, merchandise and donations 0. A bundle lets in whatever its items do.- Every paid order gets a ticket. The confirmation email shows its QR code and a 12-character code, with a Show my ticket link to the ticket on the customer’s phone. One ticket covers the whole order: a family of four has one code that lets in four.
- At the door, open the campaign’s Check-in on a phone or tablet (Full screen hides everything else) and click Scan tickets with the camera. Point it at the customer’s QR code: everyone on the order is checked in, and the screen turns green. Turn off Check in everyone on a ticket as soon as it’s scanned to choose how many come in now (a group arriving in parts).
- No QR code? Type the code, or find the order by name, email, phone or order number.
- Red means stop: the ticket is already used (the screen says when and by whom), isn’t paid, or is for another campaign. Undo reverses a check-in made by mistake.
- A weak connection doesn’t stop the door: the guest list is kept on the device, scans are answered at once, and check-ins made offline are sent when the connection is back. The screen says how many are waiting. Forget it here clears the list from the device when you’re done.
- Your Staff can check people in without editing campaigns or seeing revenue. To give only that to someone, give their role the permission to check people in at the door.
A campaign → Check-in (portal as of October 2026)
The customer's ticket (as of October 2026)
Change, pause, end
- Edit campaign: changes show on the page as soon as you save. Orders already placed keep the prices they were placed at. Removing an item takes it off the page; its sales stay in the report.
- Pause: the page says it isn’t taking orders right now. Go live to open it again.
- Ends: after the end date and time, the link takes no more orders. To extend a campaign, change its end date.
- Duplicate: a copy as a new draft, with its own link and no orders, to start next year’s event from.
- Archive: takes the campaign off your list and off the web. Its orders and report stay; tick Archived on the list to find it, and Restore it as a draft.
For integrations
Campaigns, their reports and orders can be read through the Mojo Payments API with an API key that can read payments, and thecampaignOrder/paid webhook tells your system each time an order is paid.